Pavers 101: How To Install Your Own Paver Walkway
Nate Lynch, Owner of Special Additions Landscaping, LLC
Are you sure you don't want to pay a professional to do this? No? You're committed to doing it yourself? Ok, here's how I would do it:
Step 1: Rent a skid steer. You're probably looking at $200/day +/-, but it's worth the fiscal pain. The shovel and wheelbarrow method is really overrated, and considering that everyone hates the shovel and wheelbarrow method, I can assure you that a self-propelled, diesel-sucking box of tin is certainly the way to go.

Step 2: Assess the situation… Actually, this should've been step one. There actually are a few valid reasons for undertaking the shovel and wheelbarrow method now that I think about it. These reasons include:
- the access is too limited,
- you don't want to repair the entire front yard after making 68 trips in the Bobcat to the back patio, and
- you have a teenaged nephew who will dig relentlessly for $4/hour (plus, you think he's an idiot and want to torture him).
Beyond that, I strongly advise you to rent the machine.
So back to assessing the situation… What kind of soil are we working in? What will the paver project be used for? Patio? Walkway? Driveway? The soil type and the area's intended use will determine the amount of earth we remove to prepare the subgrade.

Step 3: Demolition. Often we're removing an existing patio, walkway, driveway, etc. In this case I'm removing 4,000 lbs of concrete (rebar included). This concrete walkway is approximately 10 years old and has held together very well. As such, I assume it contains rebar. Before removing each section of concrete with the forks of my skid steer, my crew and I will cut through the existing concrete joints in order to sever the encased rebar. When that's done, I can "pop" each section with the machine's forks, and load each piece on my trailer for a run to the concrete pit later (No skid steer? Break out the sledgehammer!).
Step 4: Now we'll excavate to the project's subgrade. This site has terrific soil. Organically rich, yes, but high in sand content. This is great news. A sand-based soil is easy to excavate, and the pavers will require less base material. That saves us money. Less base material means less digging, and less gravel means… less gravel (gravel is sold by the ton, you know). For a walkway built over soil high in sand content, I can get away with the minimum amount of base (crushed rock). Four inches of base is the minimum for a paver walkway. Later, we'll install 5" of base (because we're overachievers). The paver itself is 2&3/8" thick, and we'll be installing the pavers over 1" of sand. All together, that makes approximately 8&1/2" of material. We need to dig 8&1/2" below our anticipated finished grade. By comparison, if we were building a paver driveway, our base material alone needs to be at least 10" deep (there's a big difference between foot traffic and car traffic).
Step 5: We've excavated 8&1/2" below our projected finished grade. At this point we need to install any sleeves that will accommodate irrigation pipes, electrical wire, mouse tunnels, etc. Once those are in, we compact the subgrade using our plate compactor (in the construction trades, it's fun to refer to it as a nervous turtle. Pretty cute how it shakes and vibrates while it crawls over the ground).

Step 6: This is a very important step of paver construction that is too often overlooked. We're going to install a geotextile underlayment over the subgrade. This product will create a buffer between the subgrade and our imported gravel-keeping the imported gravel clean and uncorrupted (if your gravel base mixes with existing soils, it will weaken the overall product). The geotextile also evenly distributes the "down-forces" that will be on the paver walkway. In short, the geotextile is the superhero working behind the scenes… Errr, under the scenes.

Step 7: Gravel time. Sometime between steps 1 and 2 I was on the phone ordering a load of crushed gravel. I like to use a product referred to as 3/4"-minus gravel. It compacts well. The '3/4"' refers to the size of the pieces of chipped rock, and the 'minus' refers to 'fines' which bind the base together. With my handy-dandy skid steer, I'll install two 3" lifts (layers) of gravel-watering thoroughly and compacting with the nervous turtle between lifts. I've excavated approximately 6-8" beyond the edge of my project on both sides, and have likewise installed the gravel base beyond the anticipated path of the walkway. Why? It's the rules, mate. Your base preparation needs to be built as far beyond the edge of the pavers as it is deep. Why? For the added strength, silly. Pavers aren't like concrete. The edge of the project will always be the weakest link in the chain.
When your gravel is delivered, it's an opportune time to schedule a "haul-out" of your excavated soils. Of course, there isn't a dump truck driver in the world who'll wait for you to load him with a shovel. I really hope you rented that skid steer-the truck's meter is always running!
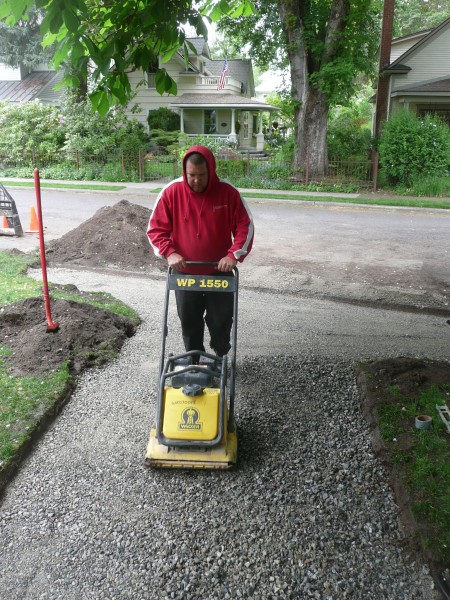
Step 8: Lots of gravel, lots of water, lots of compacting… Now that that's done, I'll take some florescent paint and quickly paint the borders of the walkway. Does it look right? If not, now's the time to make adjustments to your walkway's base.

Step 9: For a small project like this, I only need about one yard of sand (which I loaded into my truck this morning). I like using 1" electrical conduit as my 'screeding' guides. If the compacted gravel base is correct, all I need to do is lay them on the gravel and pull the sand across them. Remember: your gravel base should be approximately 3" below your anticipated finished grade prior to screeding.
After I've screeded the sand, I pull the screeding bars and fill in the voids by hand. I'll 'trowel-out' the imperfections prior to installing the block.

Step 10: Our homeowner chose a clay paver called "Pioneer Used" that is made by Mutual Materials of Spokane. We're installing them in what is called a "herringbone" pattern. Keep them tight as you go. If the gaps become loose, you'll drive yourself crazy attempting to find the imperfection that's thrown the entire walkway off-kilter. Always overlay the pavers-put more down than you think you need. Overlaying the pavers will add weight to the edges as you cut-in the border. It's a big help. Trust me.
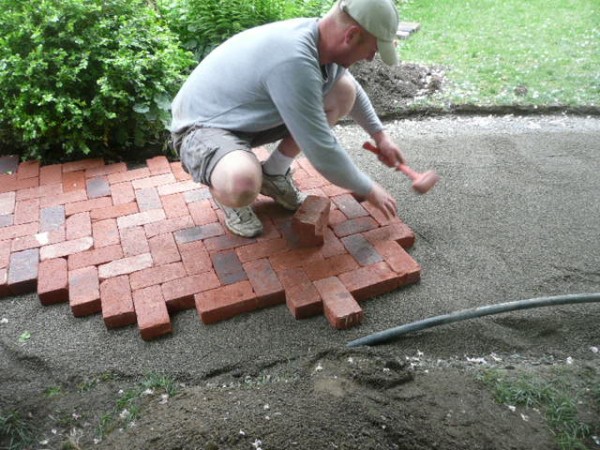
Step 11: The pavers are down. Now I'll design the border. This will allow me to achieve the arcs and curves of the walkway I desire prior to cutting. If I'm satisfied with my lines, I'll mark the border with a marker, pencil, or piece of chalk.
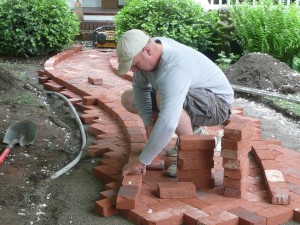

Step 12: Cut-in the border. Clay pavers are easy to cut-they take about 1/2 the time as concrete pavers because they're softer. I rarely use the water attachment on my hot saw. I only do so if it's already raining or if the neighbors have threatened to kill me due to the dust (twice!). When you're cutting a paver, you're expelling a great amount of fine dust. If you add water, you're creating liquid concrete-and that tends to coat anything and everything behind the cut (pavers, homes, cars, etc.). Adding water also creates a sloppy mess that makes the project less stable while in process.
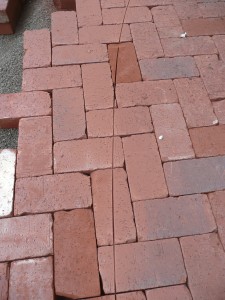
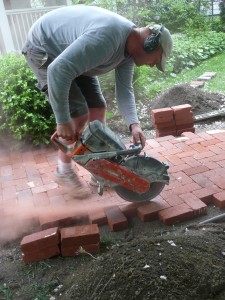
Step 13: Install the border and then the edging restraint. Make your final cuts as necessary.

Step 14: I like to compact the pavers prior to sanding. This will 'settle' the pavers into place. As soon as I'm finished, we'll sweep a polymeric joint-filler into the pavers. This type of sand has a "binder" that instantly stabilizes the sand once wet. Did you notice the entire project just sank 1/4"? That's ok, we planned for that.


Step 15: I compact the project for the last time, cleanup, and pack it in. For me, it's payday. On the way home we'll be sure to hit the nearest gas station for a 64-ounce Mountain Dew. The crew and I will toast our success in joyous landscaper revelry!

The Revelation:
This was a 180 square foot paver walkway. Our materials costs came to $6/ft. Of course, I own the skid steer, hot saw, nervous turtle, and pick-up. I also receive small discounts from the block wholesaler and the trucking company. What were your costs? I don't know for sure, but I'd guess you just spent about $10/ft to do it yourself (but the pride you now feel will last a lifetime!). Remember, the smaller the project, the higher the cost per foot.